 |
| Photo by panumas nikhomkhai from Pexels |
In this blog post I'm going to show a practical example how we can separate out configuration from the code using spring boot. We are going to keep version controlled configuration in github and build a configuration server which will be serving the configurations to your application.
Prerequisites.
- Java 1.8 or higher
- Maven 3.2 or higher
- Spring boot 2.5.0 or higher
1) Pushing the configuration to GitHub
I'm going to use the same project we used for the profile example, instead of configurations are loading from configuration files inside the project we are going to pull it from the configuration server. Configuration server will pull those configuration from git repository.
If you can remember from the last post we used application-dev.yml and application-prod.yml as the configuration files let's put the same files into two separate folder and push it to GitHub. Your folder structure will be like this.
blog-dev -> application-dev.yml
blog-prod -> application-prod.yml
Link to repository: https://github.com/Rajithkonara/blog-config-repo
2) Creating Config Server
Now that configuration are in place, let's create a spring cloud config server. All you have to do is create a new spring boot project,
- Add the spring-cloud-config-server dependency
<dependency>
 <groupId>org.springframework.cloud</groupId>
 <artifactId>spring-cloud-config-server</artifactId>
</dependency>
- Now Annotate your Main class with @EnableConfigServer
- Configure your application.yml to pull configurations from your configuration repo.
- Here search paths are the folder names we defined in our config repo.
- You can find the code for config server here: https://github.com/Rajithkonara/blog-config-server
3) Creating Config Consumer
<dependency>
  <groupId>org.springframework.cloud</groupId>
  <artifactId>spring-cloud-starter-config</artifactId>
  <version>3.0.3</version>
</dependency>
<dependency>
<groupId>org.springframework.boot</groupId>
<artifactId>spring-boot-starter-actuator</artifactId>
</dependency>- We also want to enable the /refresh endpoint to demonstrate reload configuration without restarting the application, this is done by management.endpoints.web.exposure.include property.
- By default the configurations are read at the startup, we can enable a bean to refresh the configuration by using @RefreshScop and triggering a refresh event. The RefreshScope is annotated in the Application properties class. Let's see the applications in action.
- The config-consumer code can be found the separate branch config-git in profile repository.
https://github.com/Rajithkonara/spring-boot-profile-example/tree/config-git
4) Testing the applications

- To test live reloading the configurations, assume that we have started the application using prod profile and I need to change the welcome message. Change the welcome message in the config repo and commit it to GitHub, I've change it to Welcome to production we are live, you can see the commit I made.
curl localhost:8080/actuator/refresh -d {} -H "Content-Type: application/json"
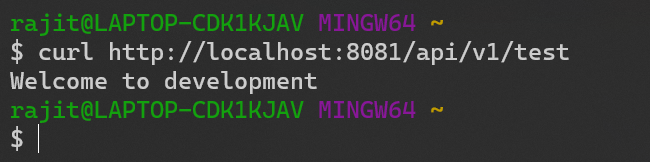
- Run the curl to your test controller and you will see the new welcome message.

Comments
Post a Comment